新增專案
我們這裡將以 Github 作為示範,大部份的平台做法都大同小異
這裡必須要先申請好 Github 的帳號
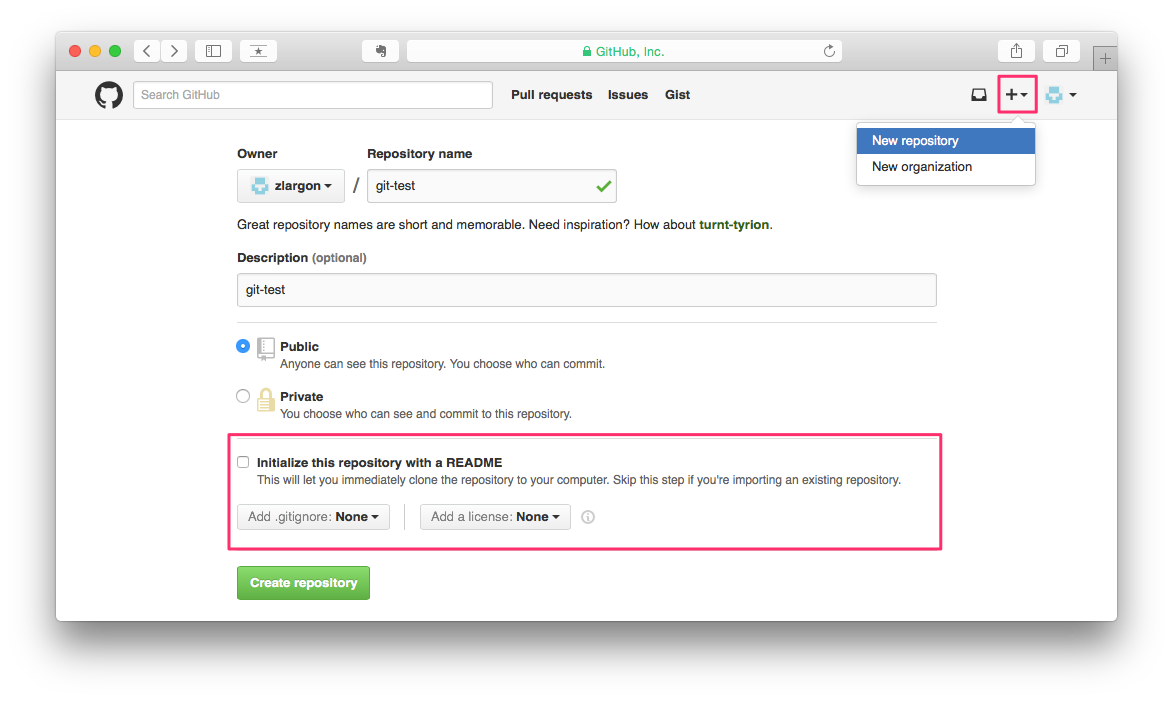
在 Github 新增專案
按右上角的
+,選擇New repository輸入 Repository name
這裡先不要勾選 "Initialize this repository with a README"
按
Create repository
新增完成後,Github 會提供你 Repository 的 URL

Repository 的 URL,分成 HTTPS 和 SSH 兩種
HTTPS:https://github.com/zlargon/git-test.git
SSH:[email protected]:zlargon/git-test.git
這兩者的差別在於,若是使用 HTTPS 的話,每次上傳 code 到 Github 的時候,都要輸入一次 username、password
而使用 SSH 的話,只要設定好一次之後,就不用再輸入帳號/密碼了
設定 SSH
當我們透過 SSH 跟 Github 連線的時候,會使用 RSA 加密演算法
RSA 金鑰是一對的,一把私鑰 + 一把公鑰
我們要先在自己的電腦產生 RSA 的金鑰,並且保存在電腦裡
然後把 "公鑰" 提供給 Github Server
之後使用 SSH 與 Github Server 連線的時候,他會用 "公鑰" 跟我們的電腦的 "私鑰" 進行加密以及身份認證
因此設定了 SSH 之後,我們連線時就不要再輸入 username 跟 password
1. 使用 ssh-keygen 產生 RSA 金鑰
首先我們要先檢查我們的電腦有沒有產生過 RSA 金鑰
通常產生過的金鑰會被放在 ~/.ssh 資料夾底下
- id_rsa:私鑰
- id_rsa.pub:公鑰(pub = public)

如果已經有了,就不需要再重新產生了
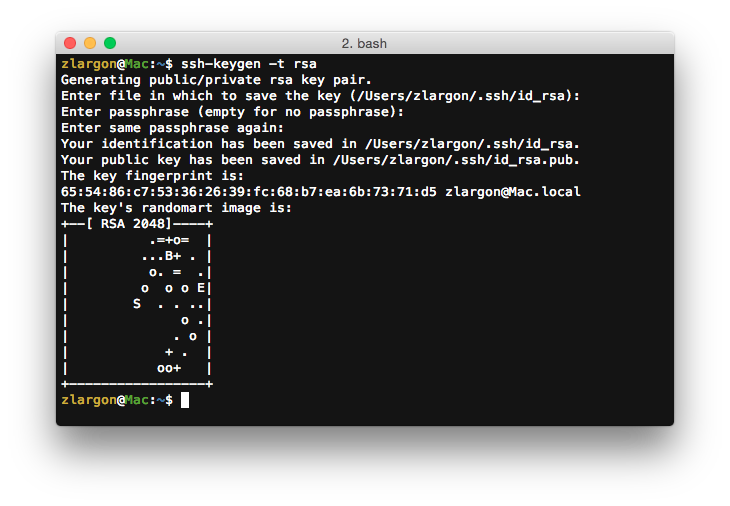
如果沒有的話,就要使用 ssh-keygen 來產生
$ ssh-keygen -t rsa
這裡只要一直按 enter 就行了
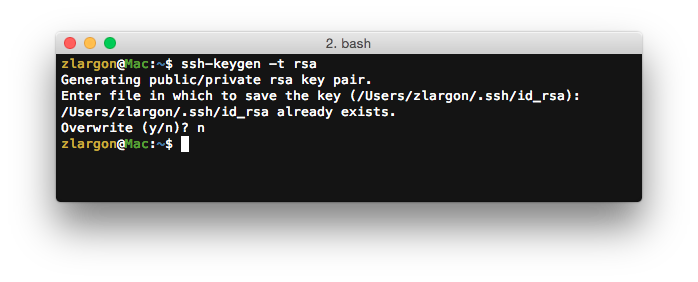
如果出現 id_rsa already exists 的敘述,要按 "n" 取消,不然原本的 id_rsa 會被覆蓋
/xxx/xxx/.ssh/id_rsa already exists.
Overwrite (y/n)? n
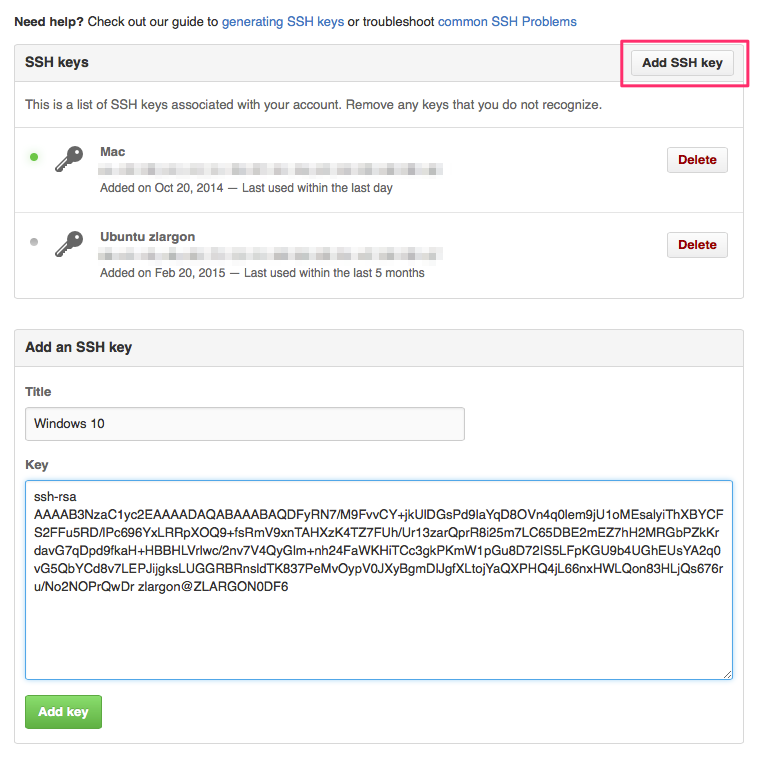
2. 將公鑰(id_rsa.pub)上傳到 Github Server
點選 Settings > SSH Keys
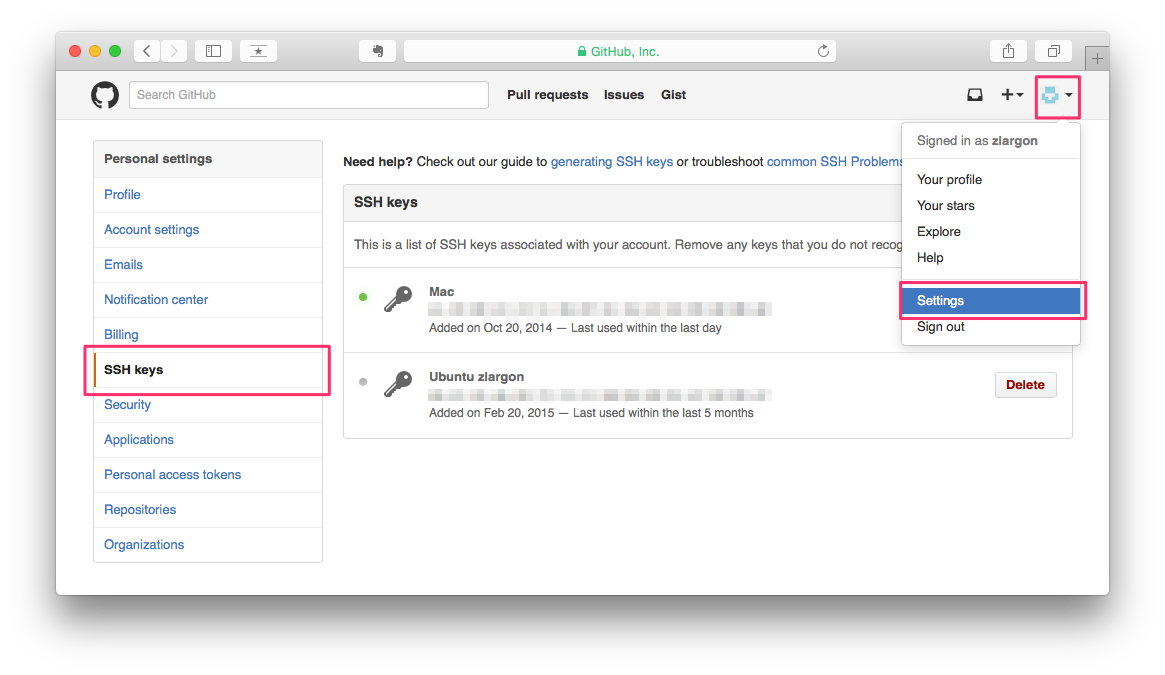
點右上角的 "Add SSH key"
把 ~/.ssh/id_rsa.pub 的內容複製貼上,點選 "Add key" 送出,這樣就大功告成了
測試 SSH
$ ssh -T [email protected]
如果有出現以下字樣,就表示 SSH 設定成功!

初次連線 Github Server 可能會出現以下訊息,輸入 yes 即可
The authenticity of host 'github.com (207.97.227.239)' can't be established.
# RSA key fingerprint is 16:27:ac:a5:76:28:2d:36:63:1b:56:4d:eb:df:a6:48.
# Are you sure you want to continue connecting (yes/no)? yes